GPX Track Overlay Guide
Step-by-step guide for turning your activity or route into a 3D-printable STL file
What can you do with this tool?
The GPX Track Overlay tool converts any .gpx activity or route file into a 3D-printable STL file. There are two ways to use it:
- Option A — Standalone STL: Generate a full-track STL at any scale and with any dimensions you choose. Great for standalone prints and display pieces.
- Option B — Miniature Overlay: Automatically scale and crop the track to match one of our geographic miniatures, so you can add it as a precisely aligned multi-colour layer in your slicer.
Create a standalone 3D-printable STL from any GPX file — independent of any miniature. You control the scale, track width, and height yourself.
Step 1 Open the GPX Track Overlay tool
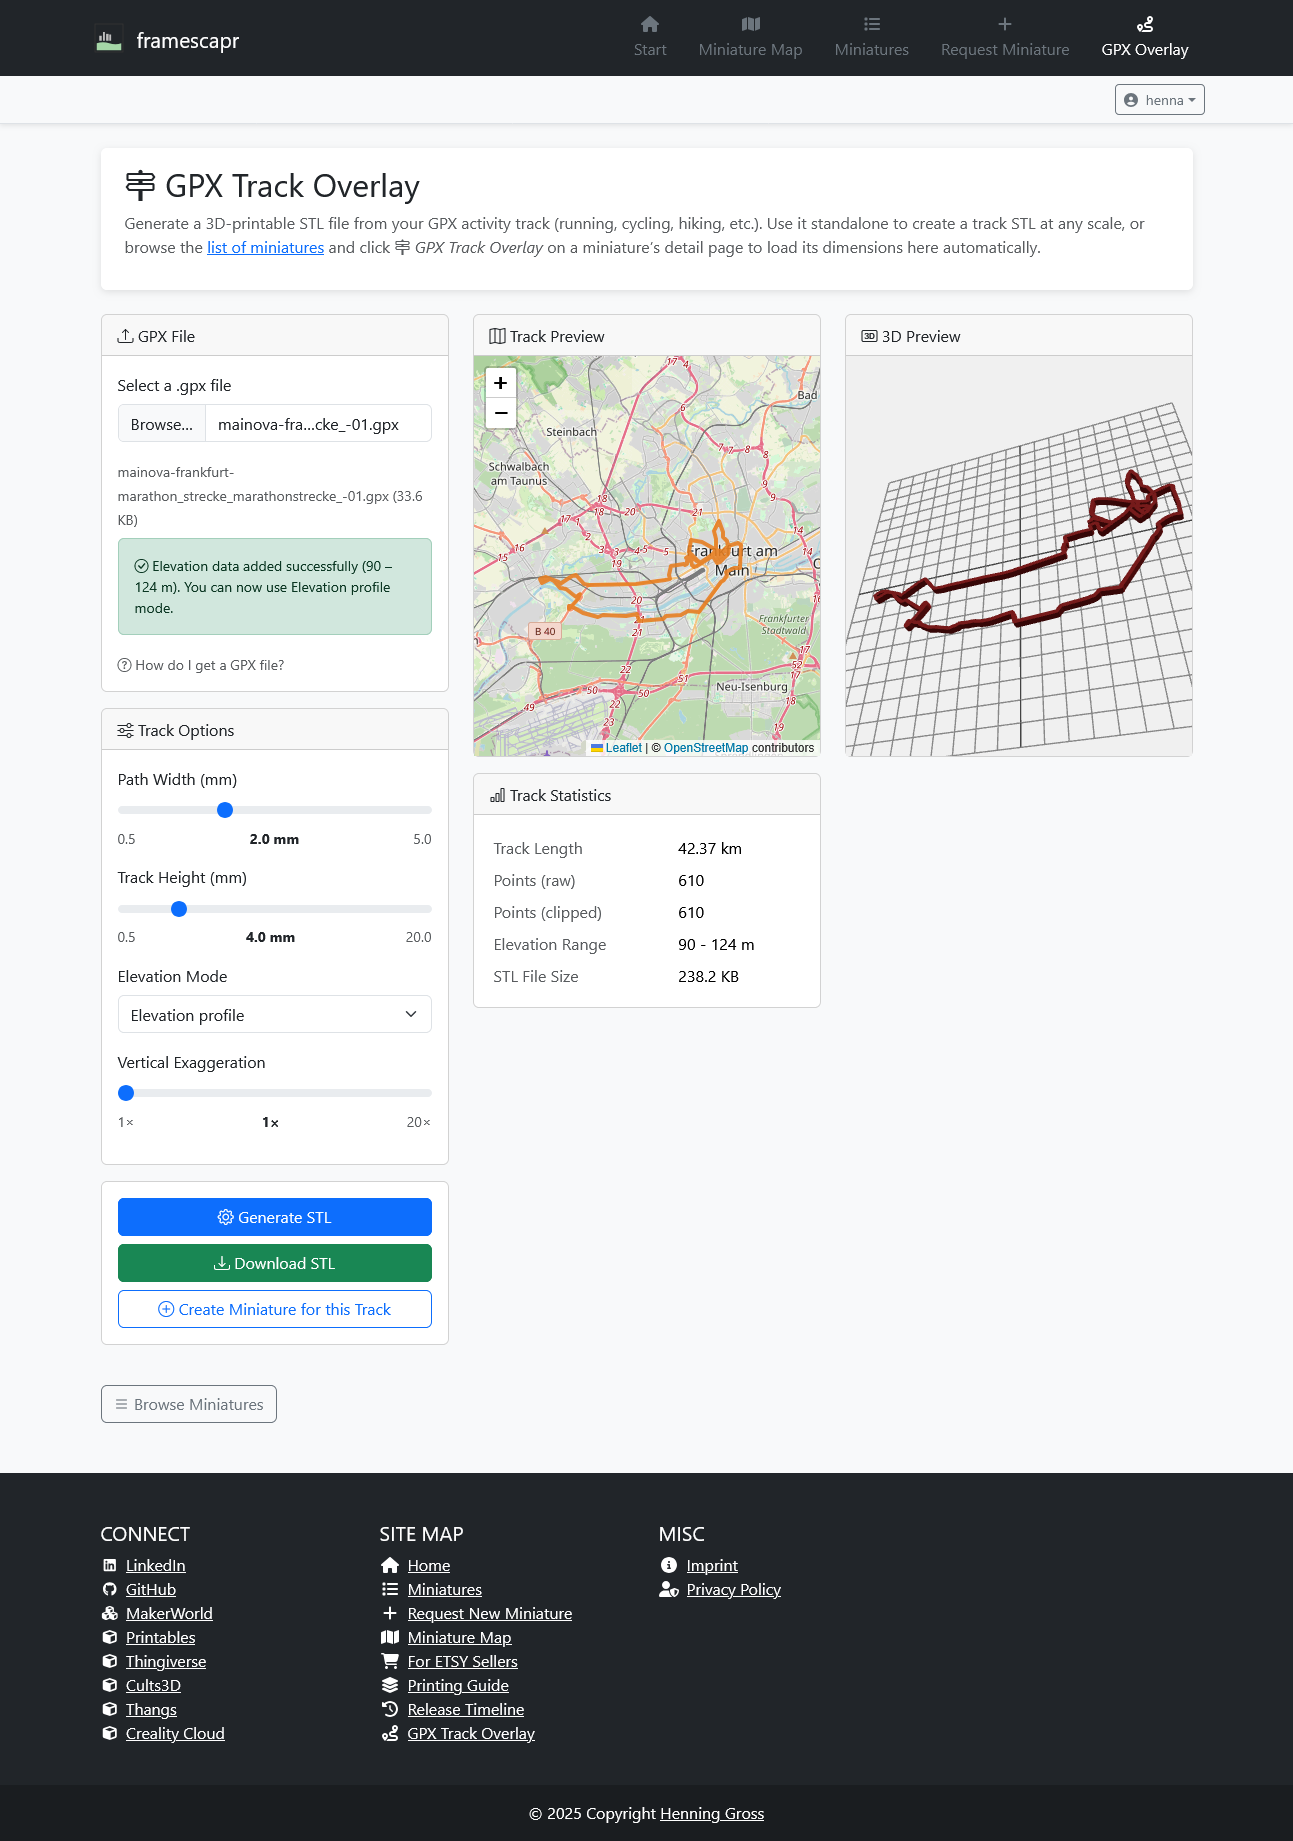
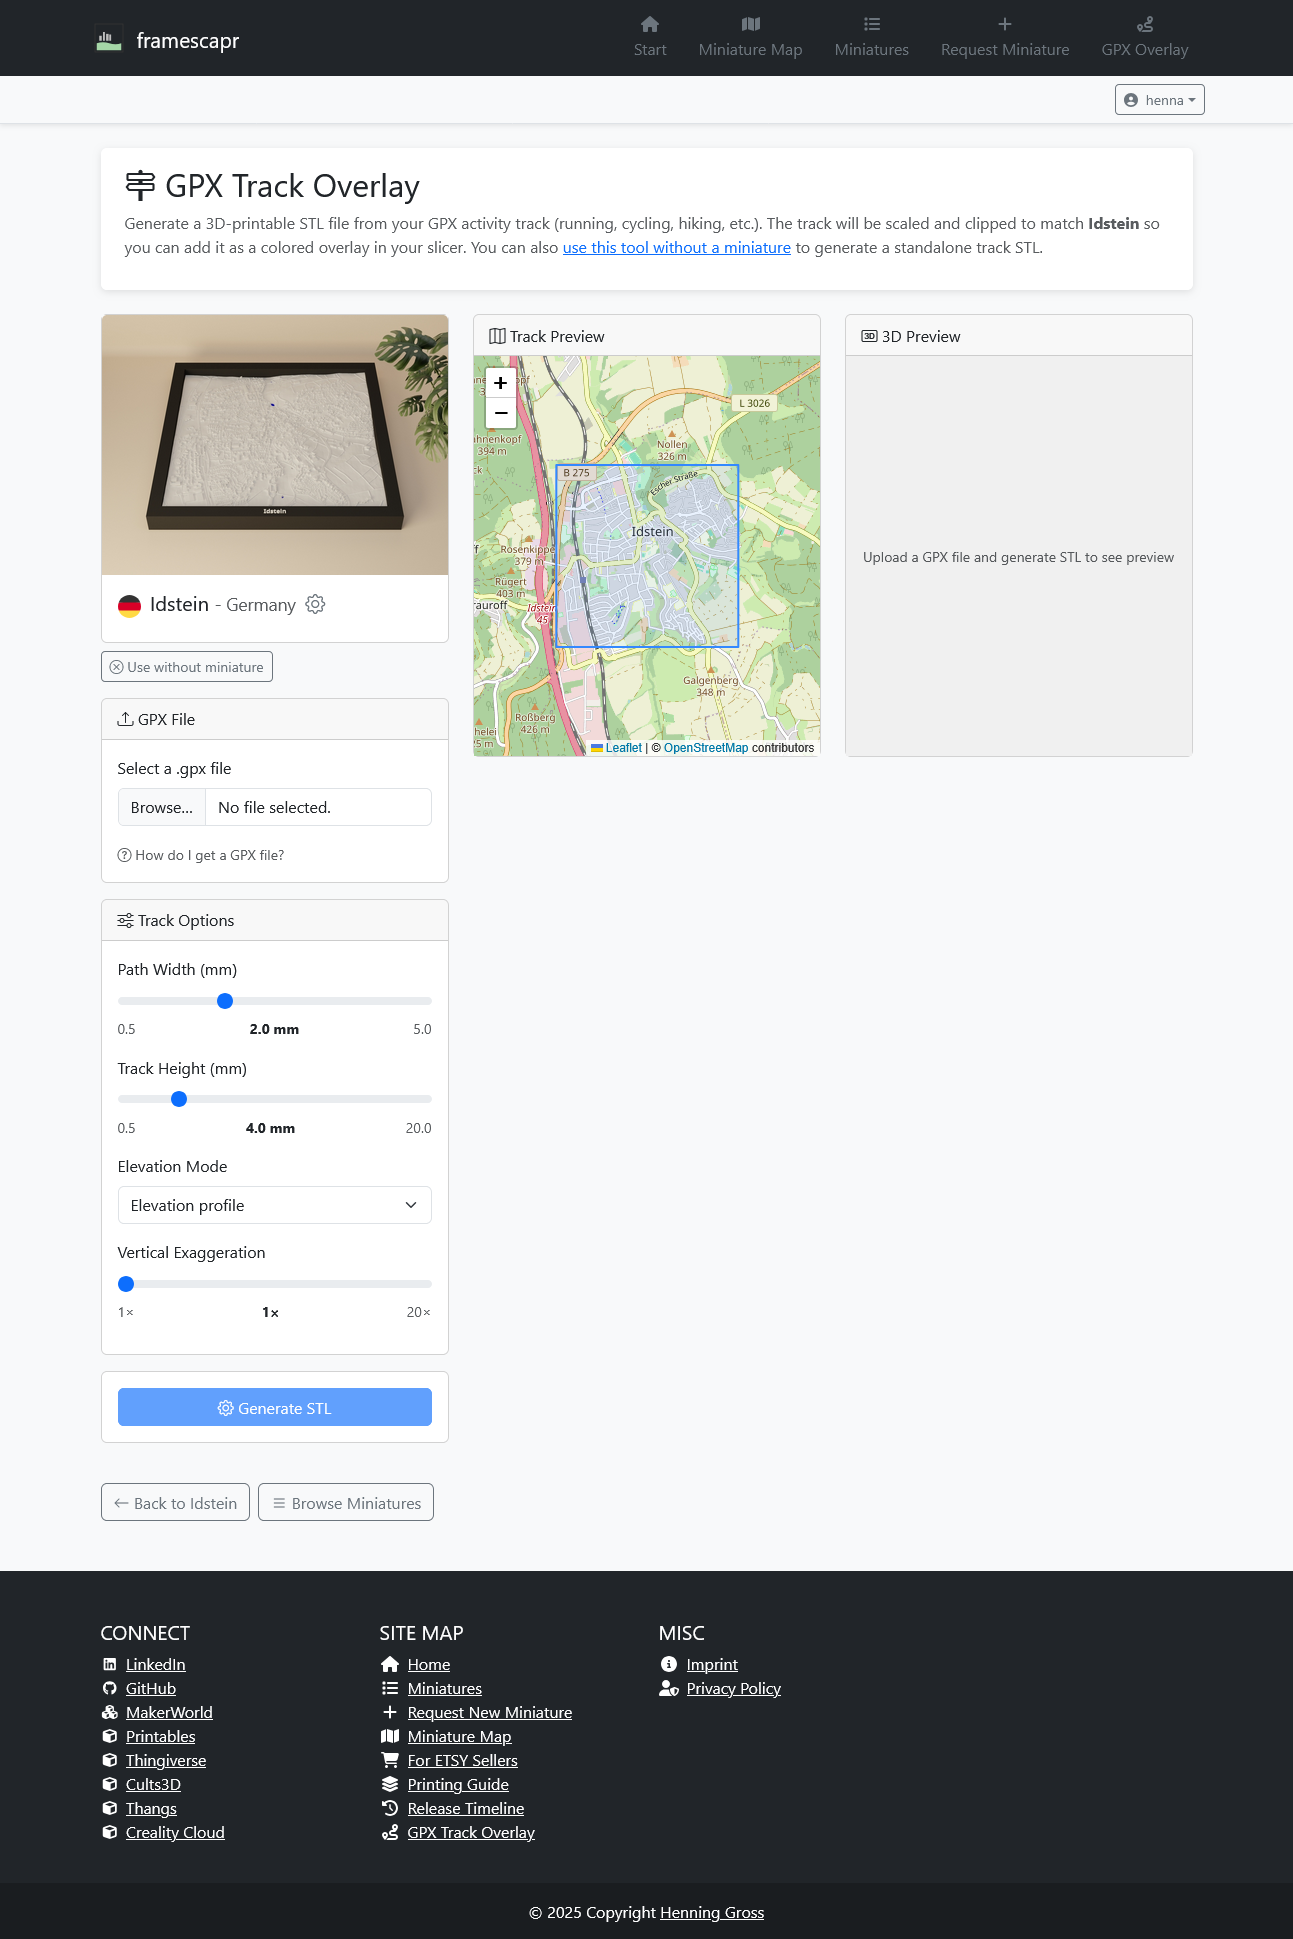
Navigate to the GPX Track Overlay via the navigation bar at the top of the page. You will see a three-panel layout: GPX file upload on the left, an interactive map preview in the centre, and a 3D preview on the right.
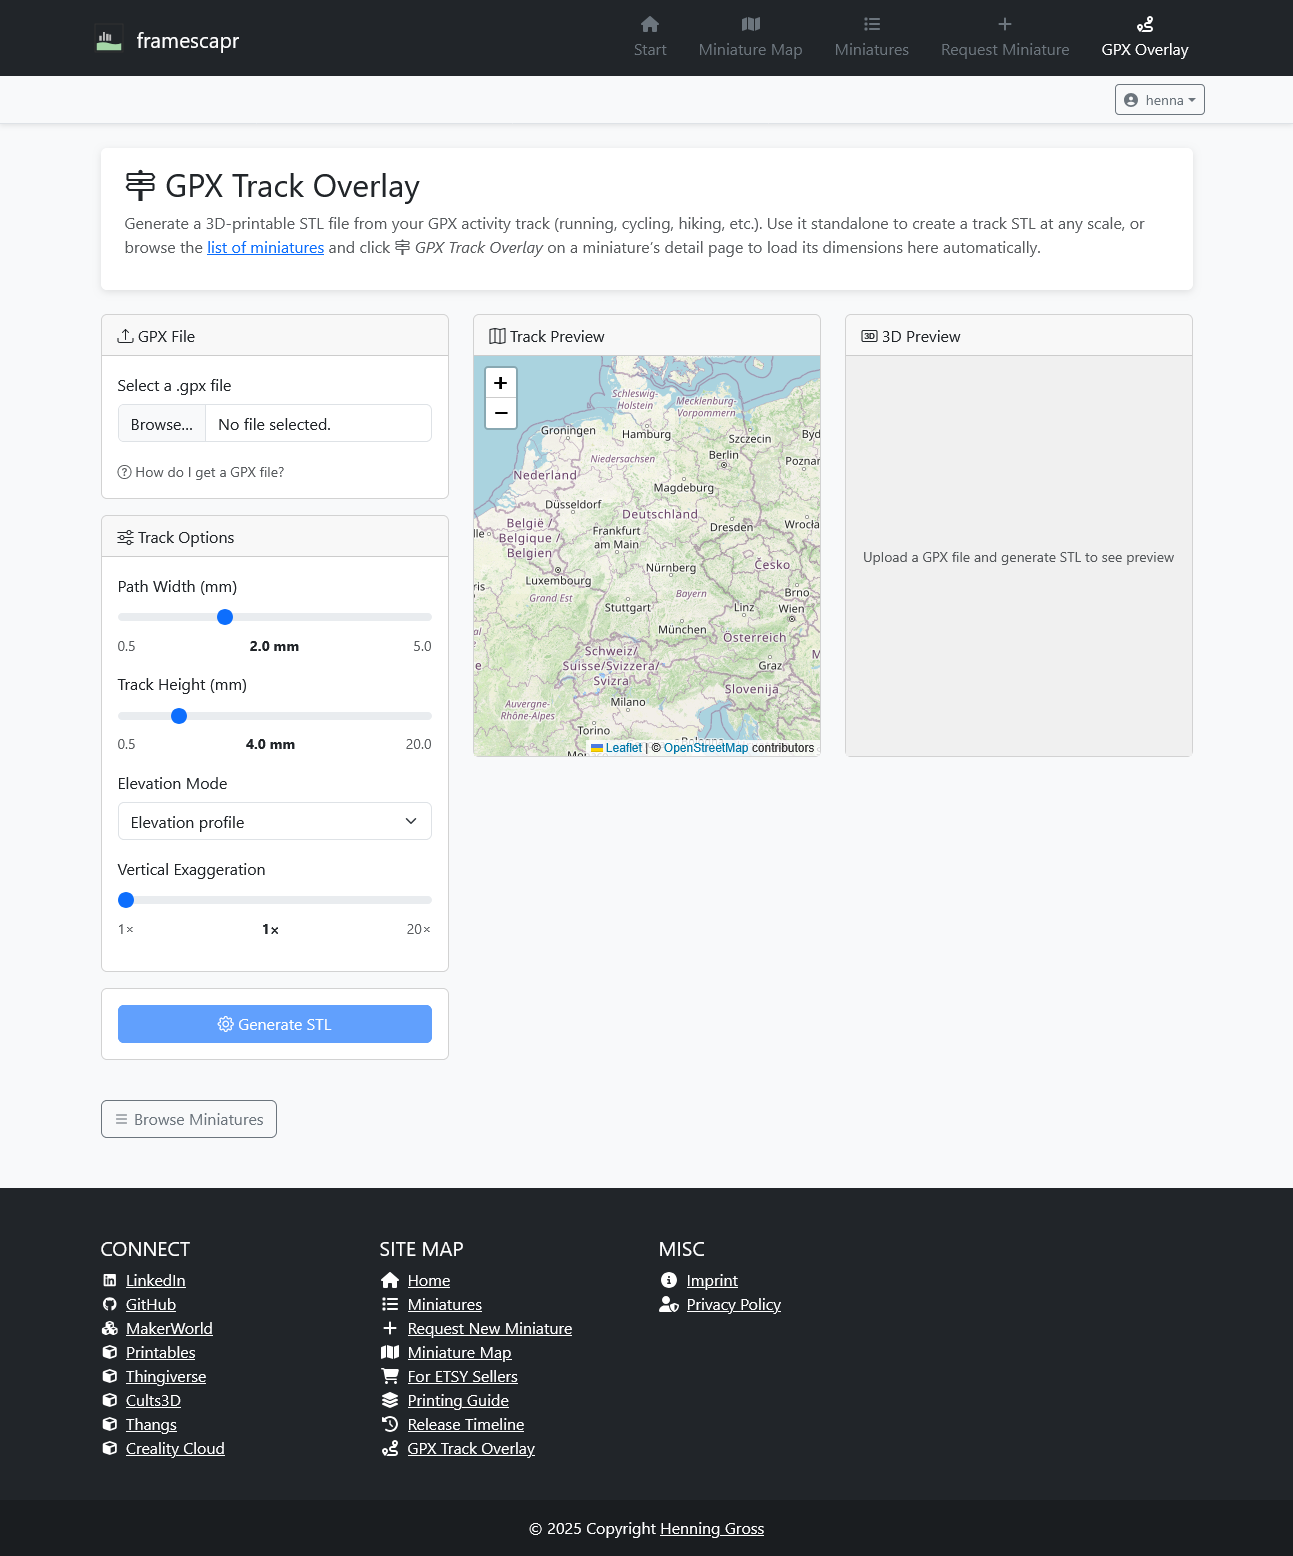
Step 2 Load your GPX file
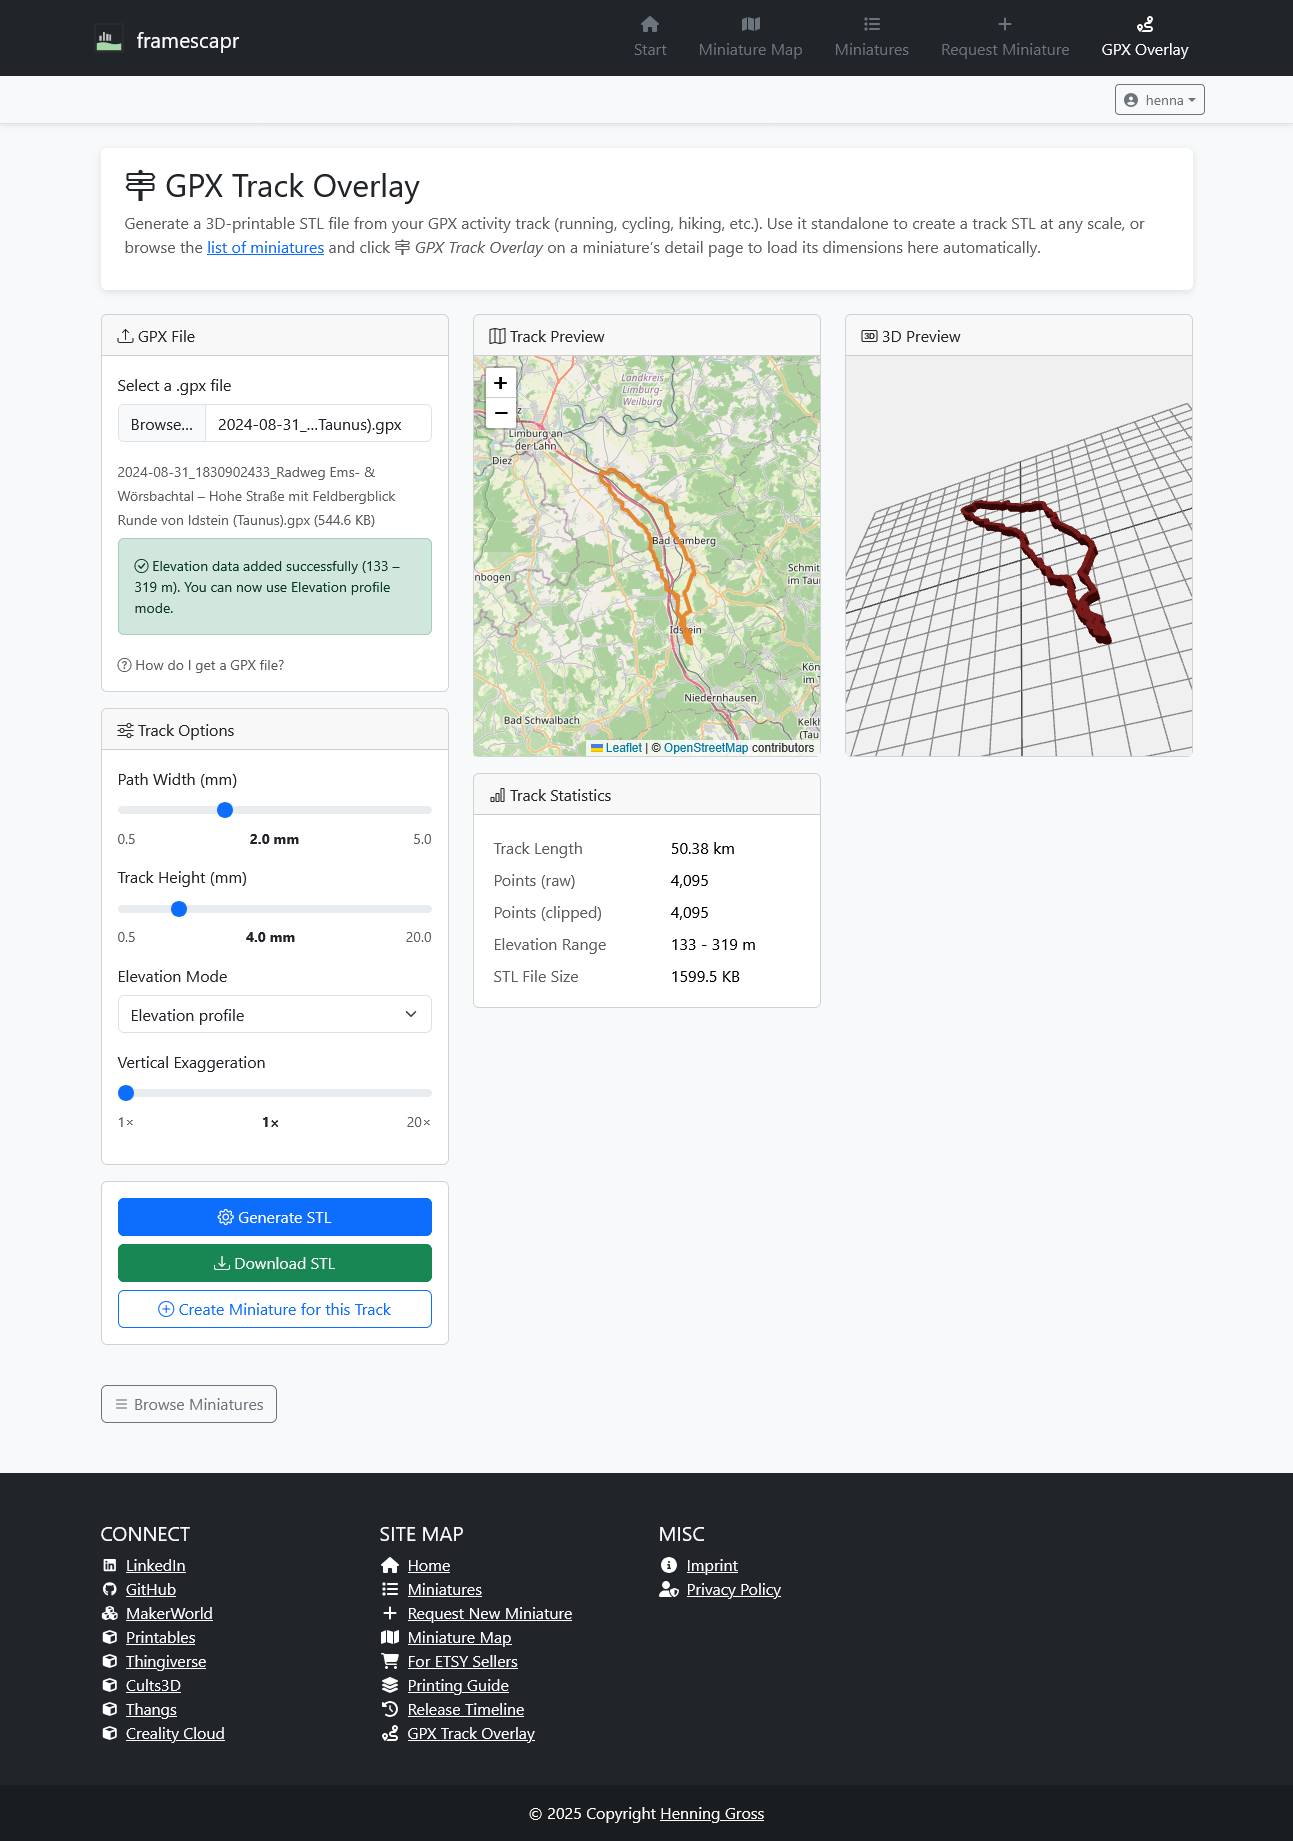
Click Browse… in the GPX File section and select your .gpx file. The track immediately appears on the map preview. The file name and size are shown for confirmation.
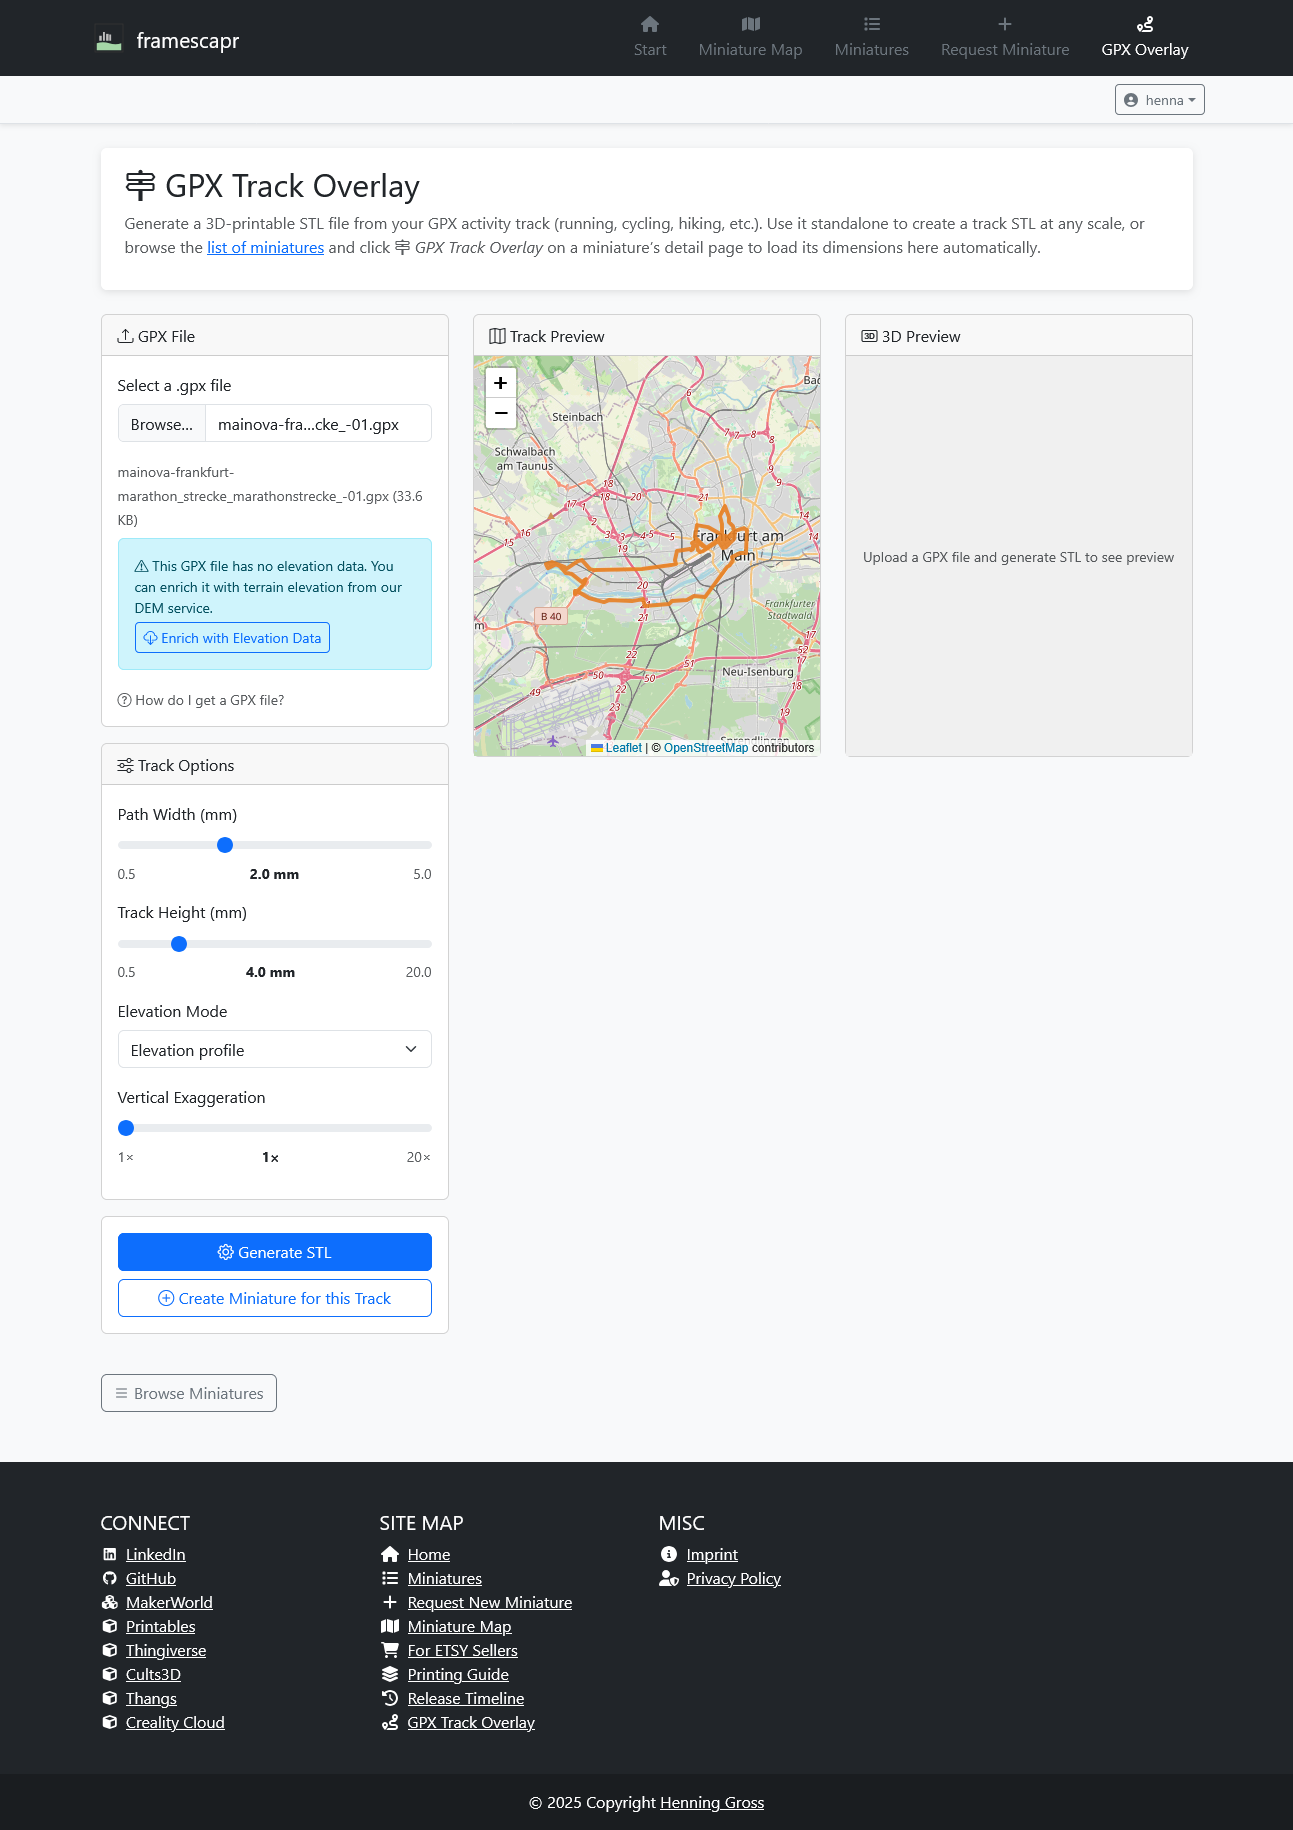
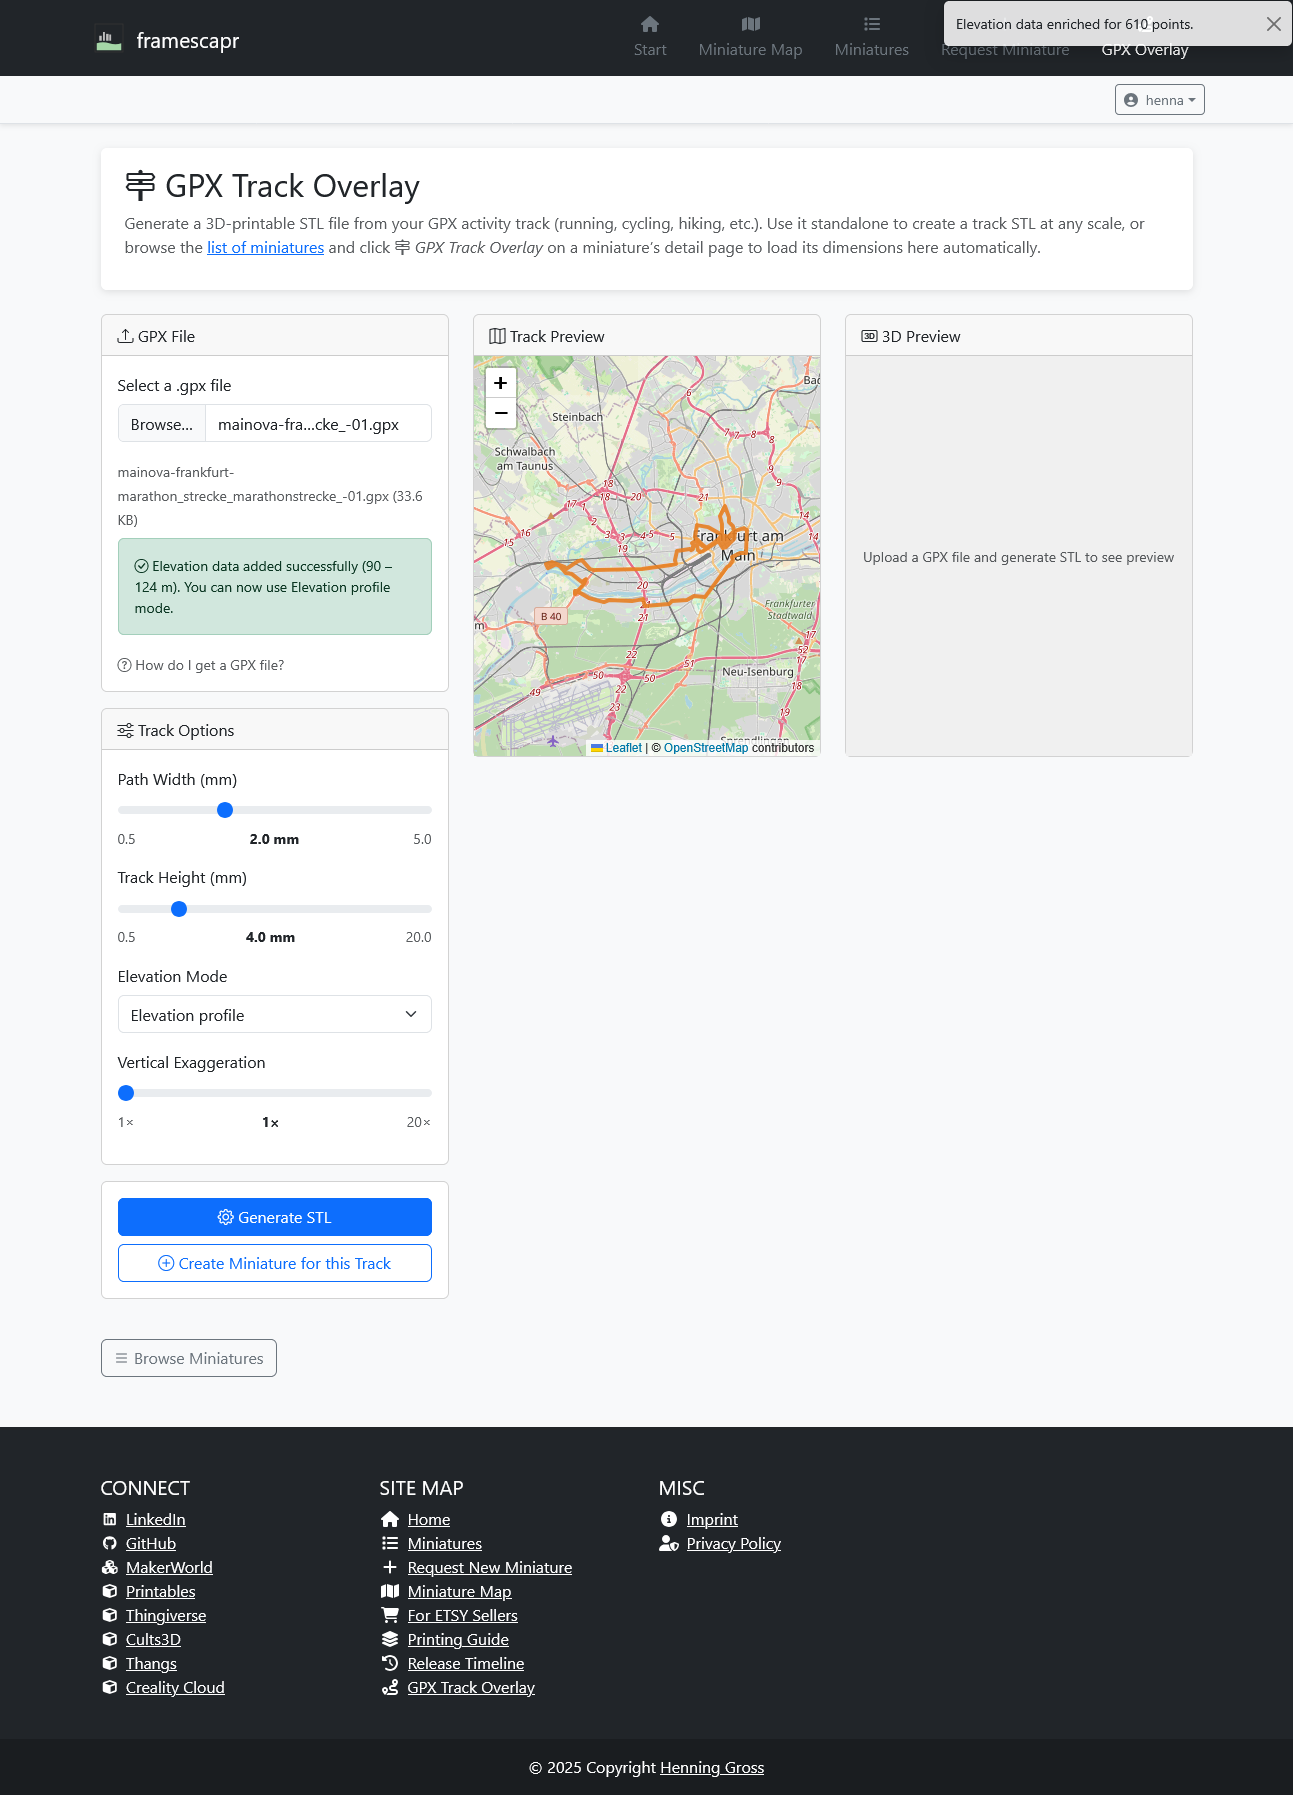
Step 3 Enrich with elevation data Optional
Click Enrich with Elevation Data to replace GPS/barometric altitude values with accurate terrain elevation from our DEM (Digital Elevation Model) service. A green confirmation message shows the resulting elevation range (e.g. 90–124 m), and a toast notification at the top confirms how many track points were enriched.
After enrichment the Elevation profile mode in Track Options becomes fully meaningful: the 3D track will follow the actual terrain height rather than flat recorded data.
Step 4 Configure, generate, and download
Adjust the Track Options to your liking, then click Generate STL:
| Option | Description |
|---|---|
| Path Width | Horizontal width of the track tube (0.5–5.0 mm) |
| Track Height | Vertical height of the track extrusion (0.5–20.0 mm) |
| Elevation Mode | Elevation profile follows terrain height; Flat keeps the track at a uniform level |
| Vertical Exaggeration | Multiplies height differences (1×–20×) to make elevation changes more visible |
Once generated, the 3D preview updates and track statistics (distance, points, elevation range, file size) appear below the map. Click the green Download STL button to save the file.
Create a GPX track STL that is automatically scaled and cropped to fit one of our geographic miniatures, then add it as a precisely aligned colour layer in your slicer.
Step 1 Export a GPX file from your app
You need a .gpx file of your activity or planned route. Most tracking and navigation apps support GPX export:
| App | How to export |
|---|---|
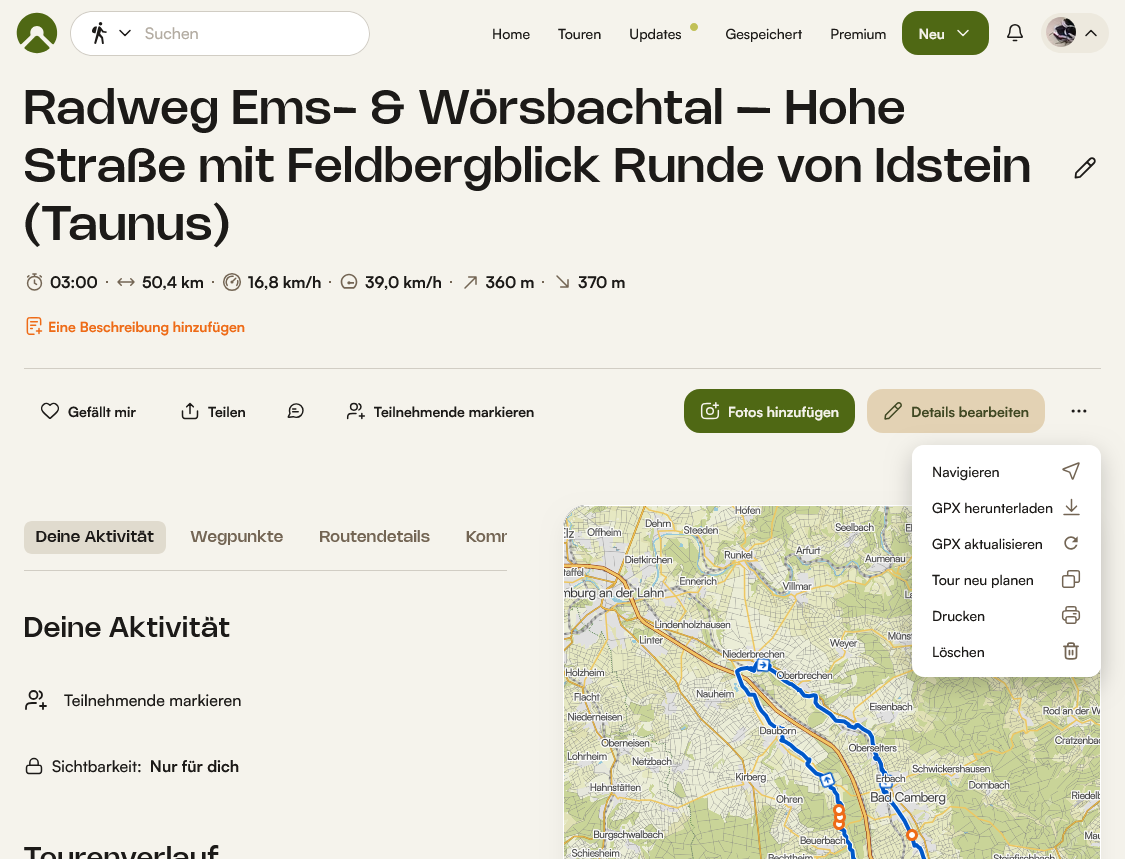
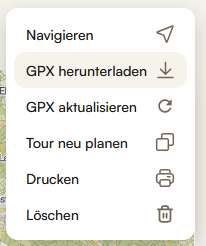
| Komoot | Open your activity → click … menu → GPX herunterladen |
| Strava | Open the activity → … → Export GPX |
| Garmin Connect | Open the activity → … → Export Original |
| AllTrails | Open the trail → Export → GPX |
| Apple Health / GoPro | Use the How do I get a GPX file? help section in the tool itself for detailed instructions |
Step 2 Choose your workflow
Go directly to the GPX Track Overlay tool. Upload your GPX file and generate an STL at any scale, independent of any specific miniature.
Best for standalone prints, wall art, or when you just want a 3D track without tying it to a specific region.
Browse the list of miniatures, open the detail page of the miniature whose geographic area covers your route, and click the GPX Track Overlay button. The tool opens pre-loaded with the miniature’s geographic bounds.
Best for adding your personal route over an existing geographic miniature print as a coloured highlight.
Continuing with Option B: Miniature Overlay
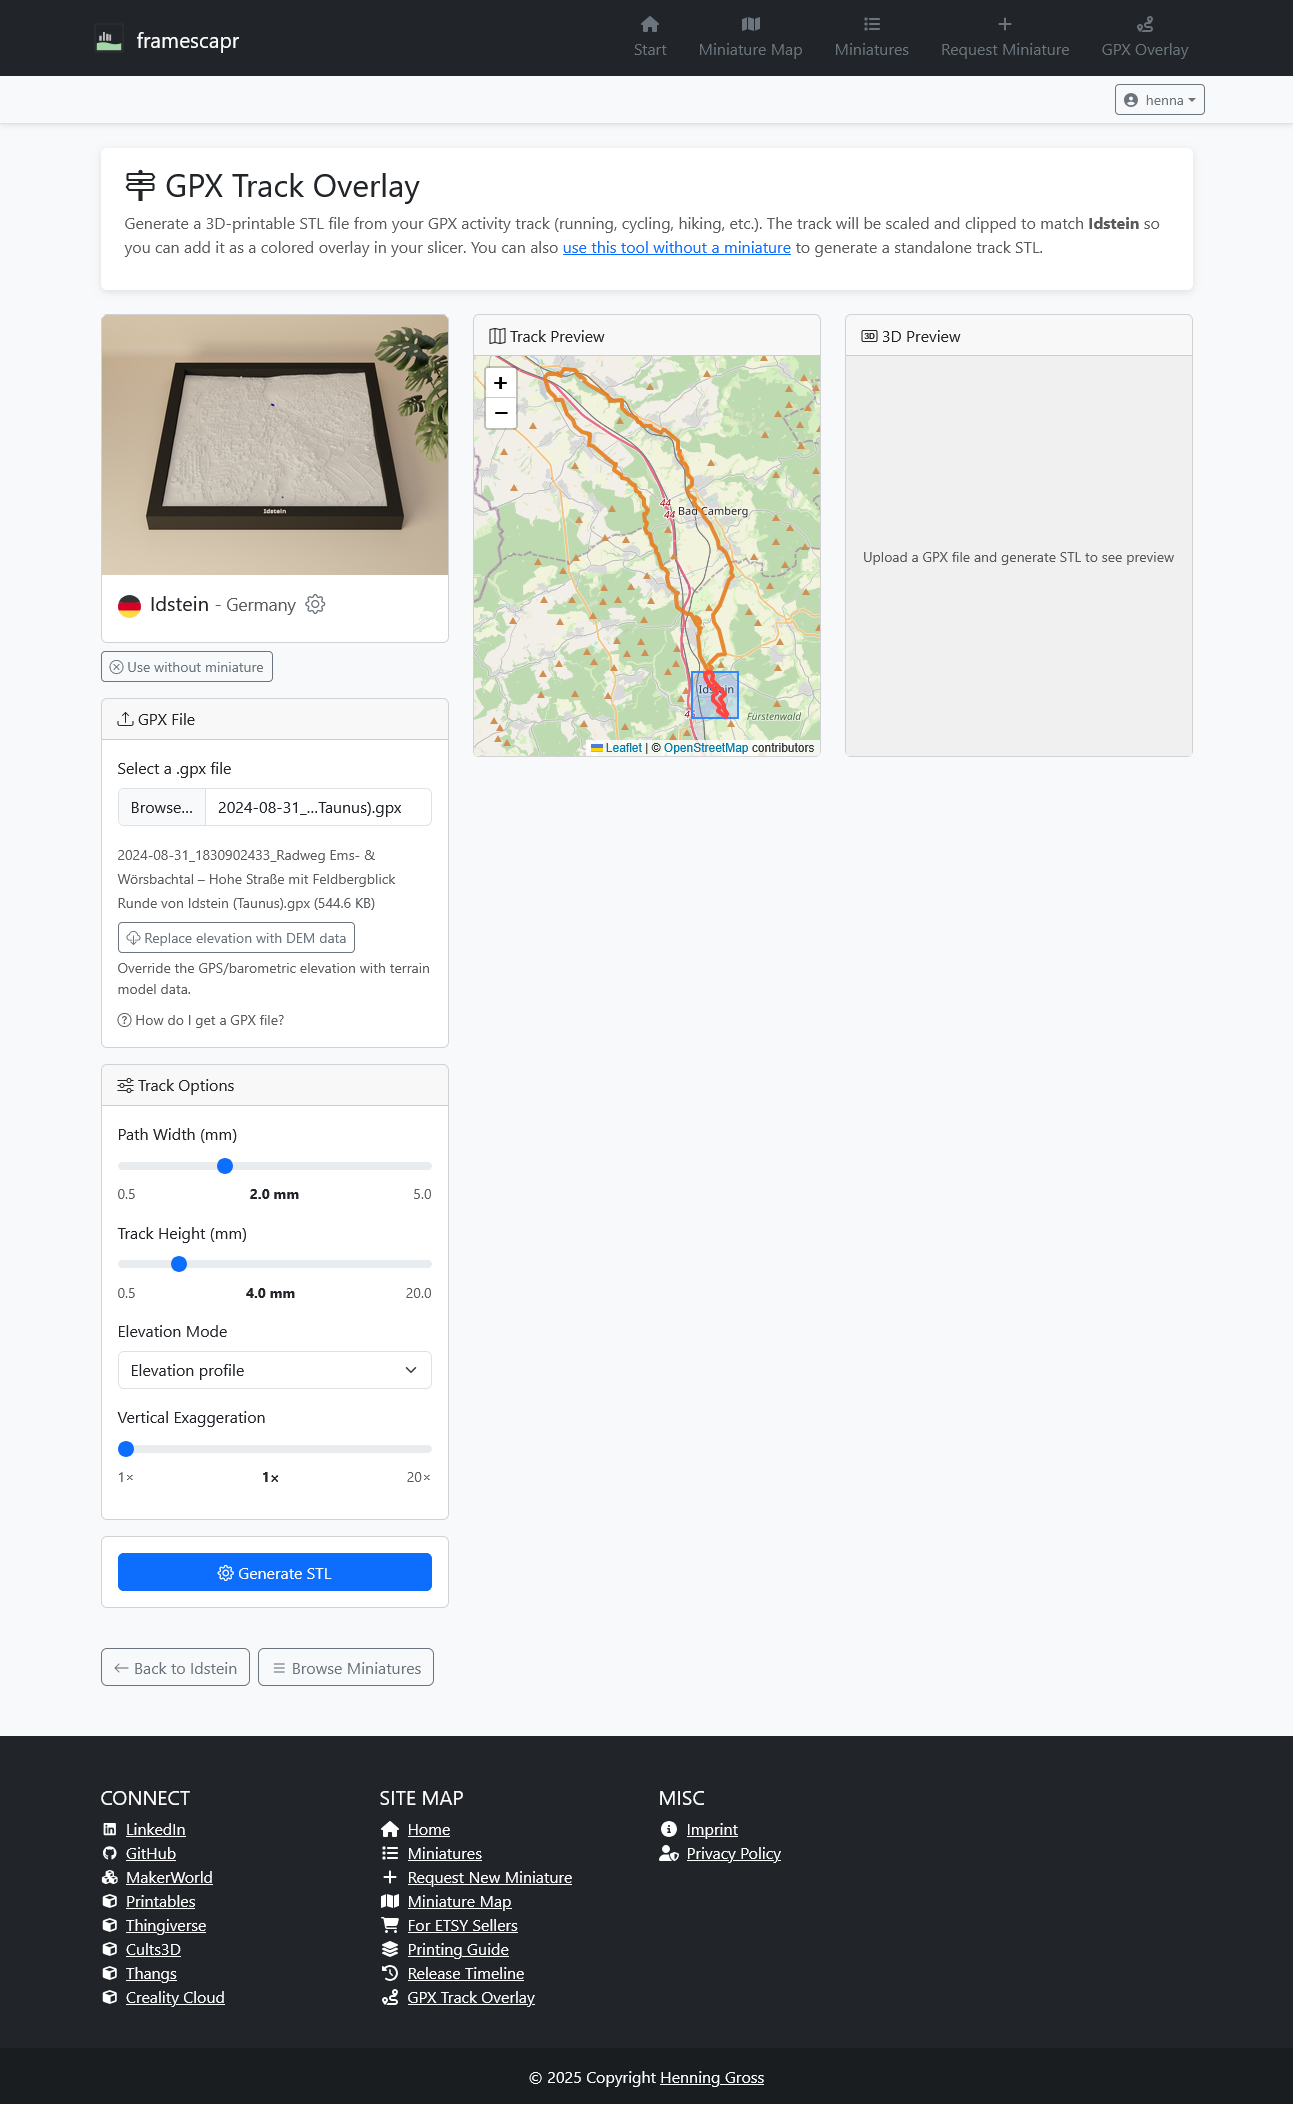
Step 3 Upload your GPX file & inspect the crop
Click Browse… and select your GPX file. The track appears on the map in orange. A blue rectangle shows the geographic area covered by the miniature — only the track portion within this rectangle is included in the exported STL.
If the file lacks reliable elevation data, a Replace elevation with DEM data button appears. Click it to enrich the track with accurate terrain elevation from our DEM service.
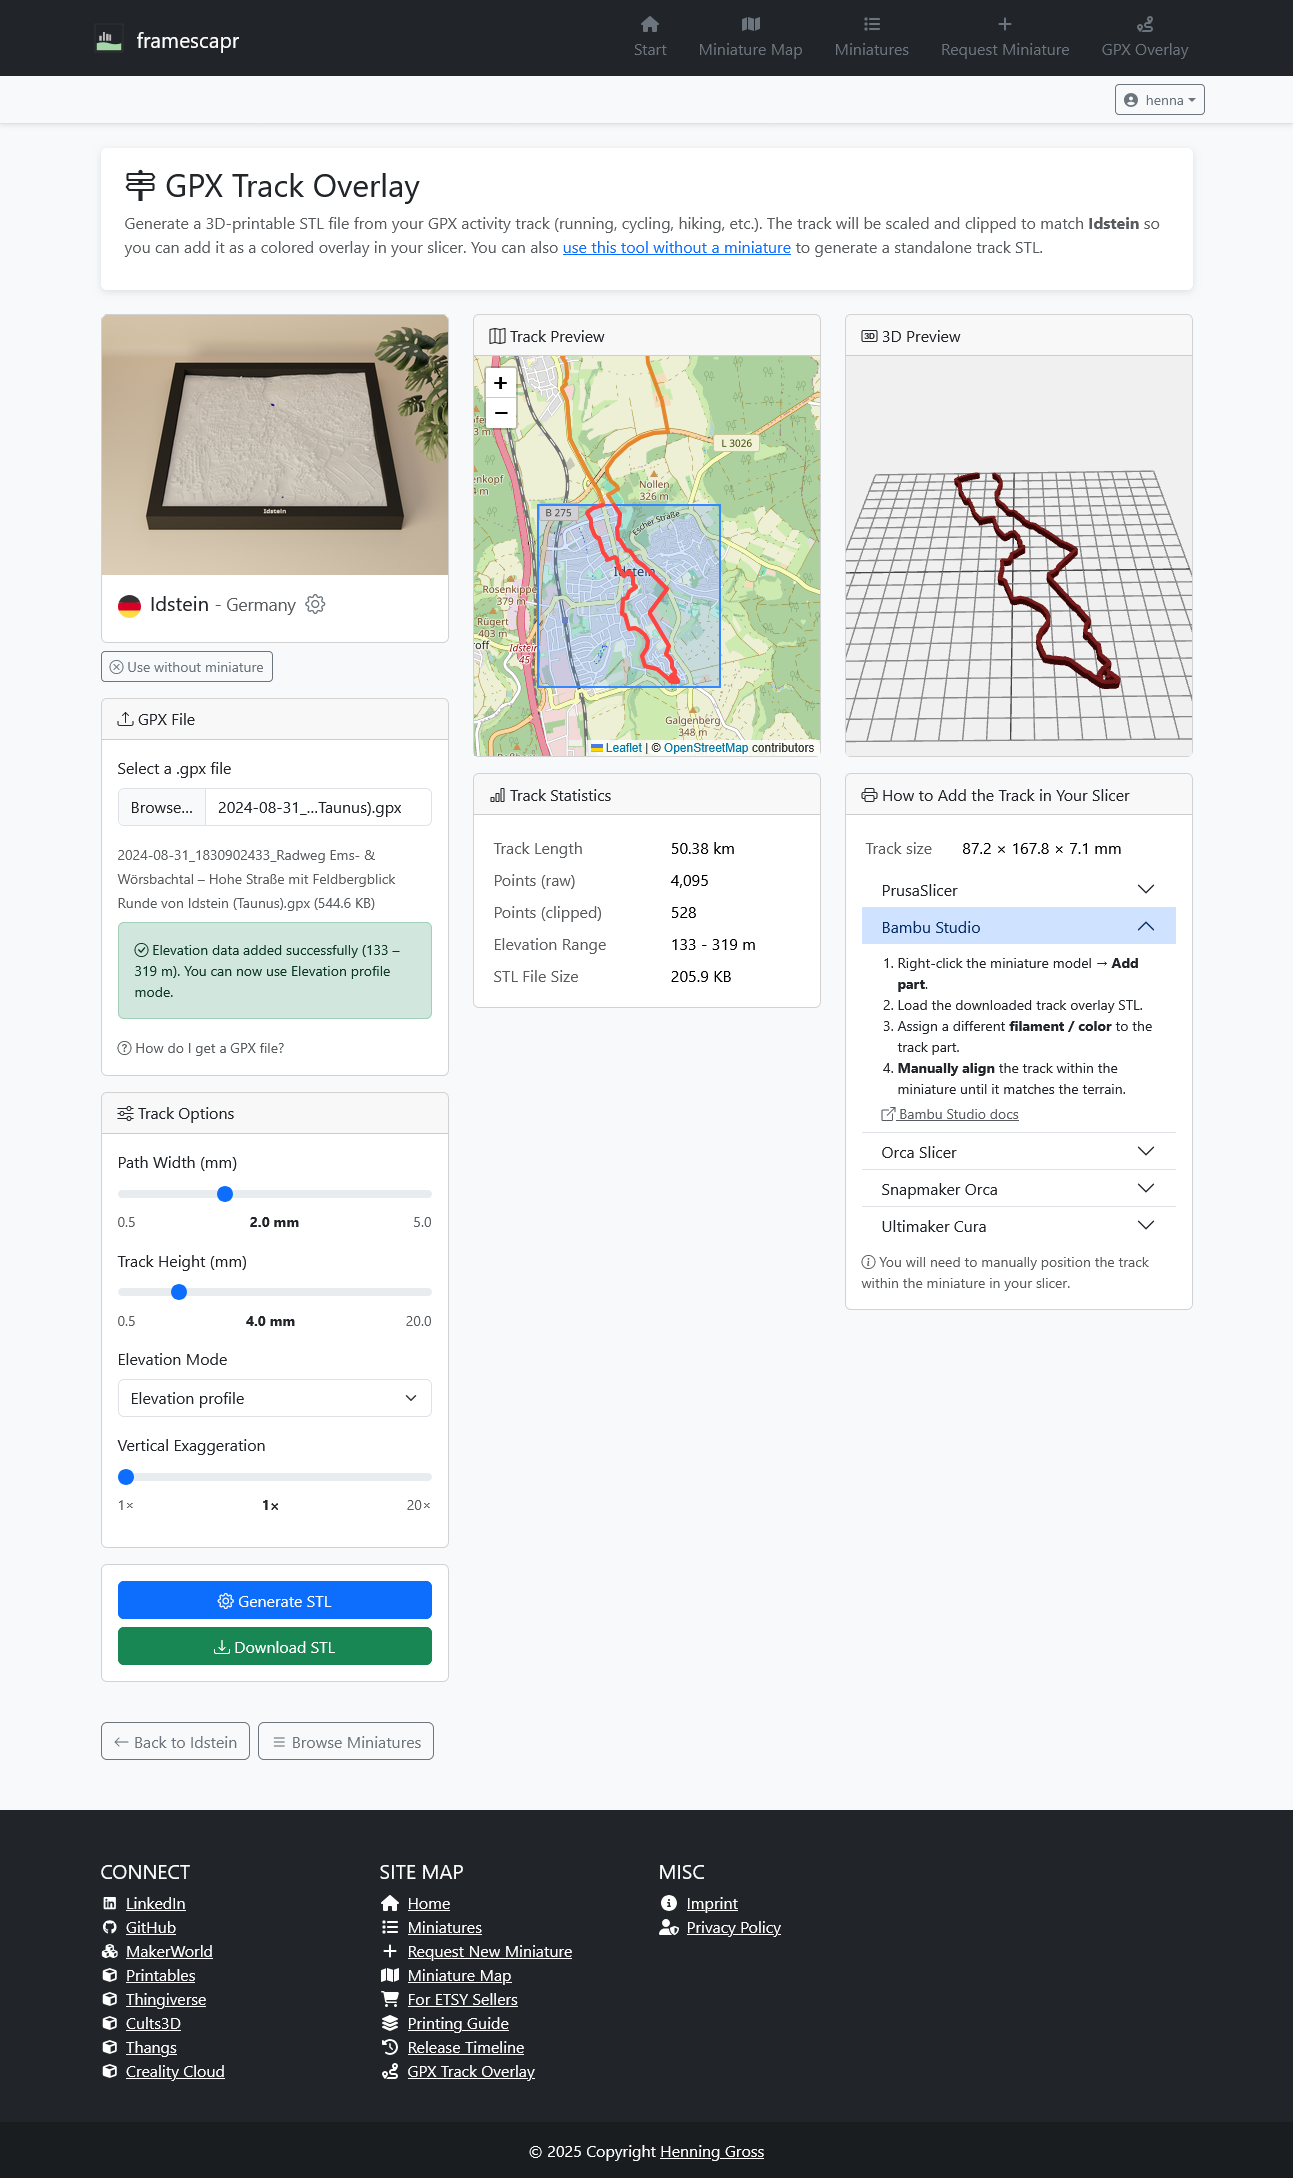
Step 4 Generate the STL and download
Adjust the Track Options (Path Width, Track Height, Elevation Mode, Vertical Exaggeration) and click Generate STL. The 3D preview updates to show only the clipped portion of the track that fits within the miniature area.
The right panel shows slicer-specific instructions for Bambu Studio, Orca Slicer, PrusaSlicer, Snapmaker Orca, and Ultimaker Cura. Expand the accordion item matching your slicer for step-by-step guidance.
Click the green Download STL button to save the track file to your computer.
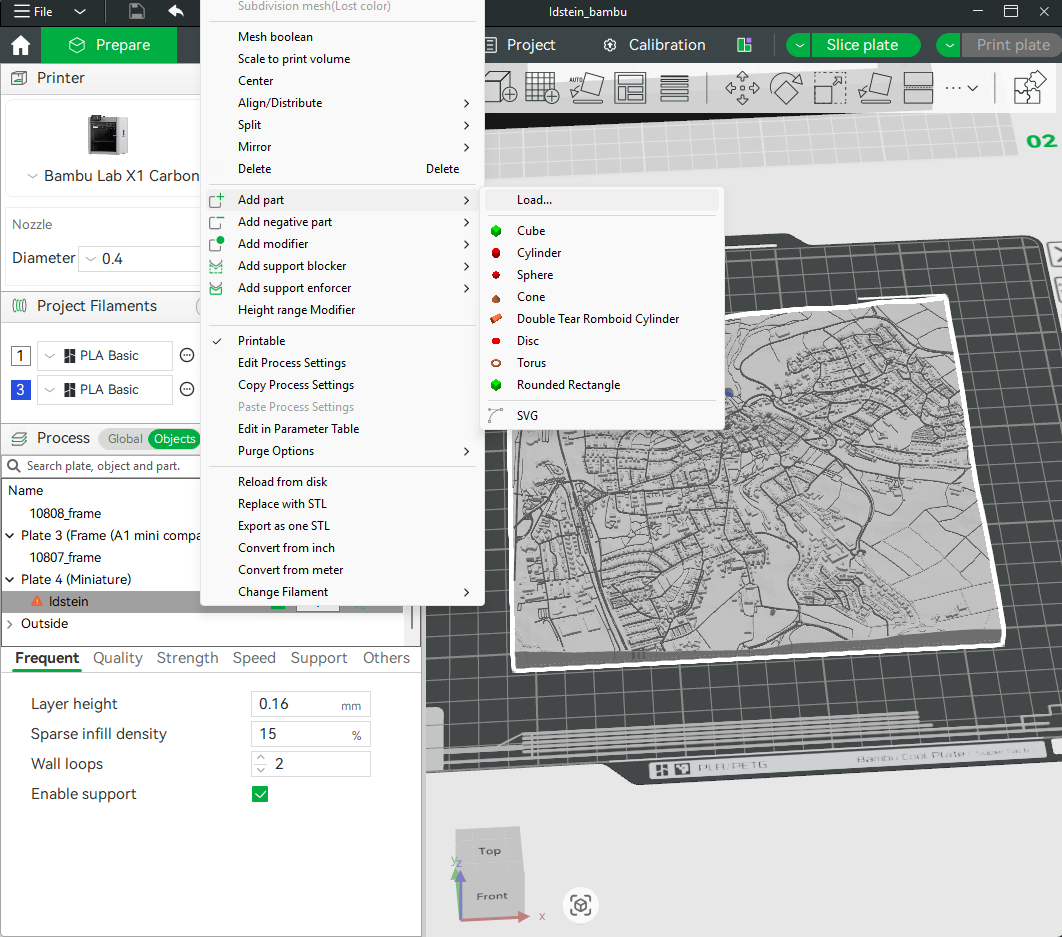
Step 5 Add the track to your slicer as a part
Open the miniature’s .3mf file (downloaded from the miniature’s detail page) in Bambu Studio or Orca Slicer. Then:
- Right-click the miniature model in the 3D viewport or the object tree.
- Select Add part → Load…
- Navigate to and select the downloaded
gpx_track_overlay_*.stlfile.
The track STL is loaded as a separate part of the same model object. This is what allows it to be printed in its own filament colour.
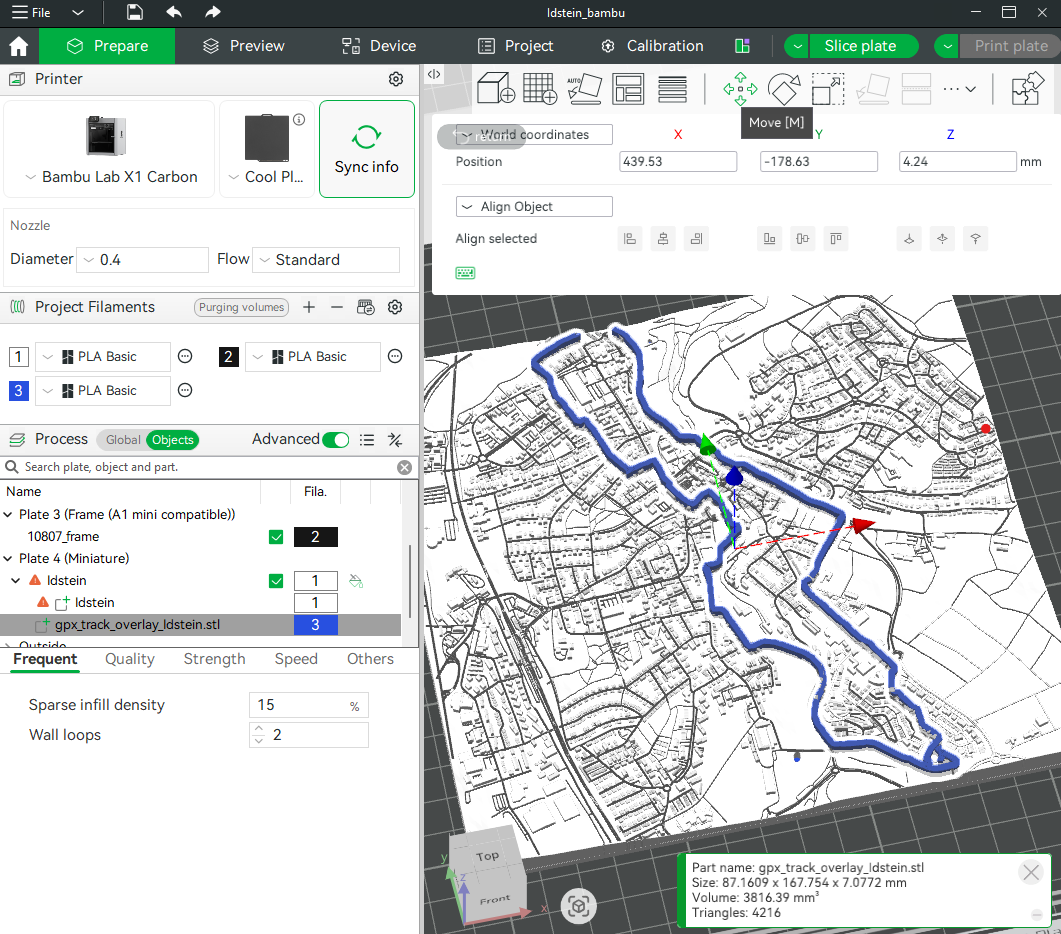
Step 6 Assign a colour and align the track
The track part appears in the object tree below the miniature model. Select it and assign a different filament slot (e.g. filament 3 in blue) via the filament number column in the object tree.
Use the Move tool or the X/Y coordinate input fields to align the track over the miniature terrain. The track STL is already scaled to the miniature’s exact physical size — you only need to fine-tune the XY position until the path sits correctly over the underlying map detail.
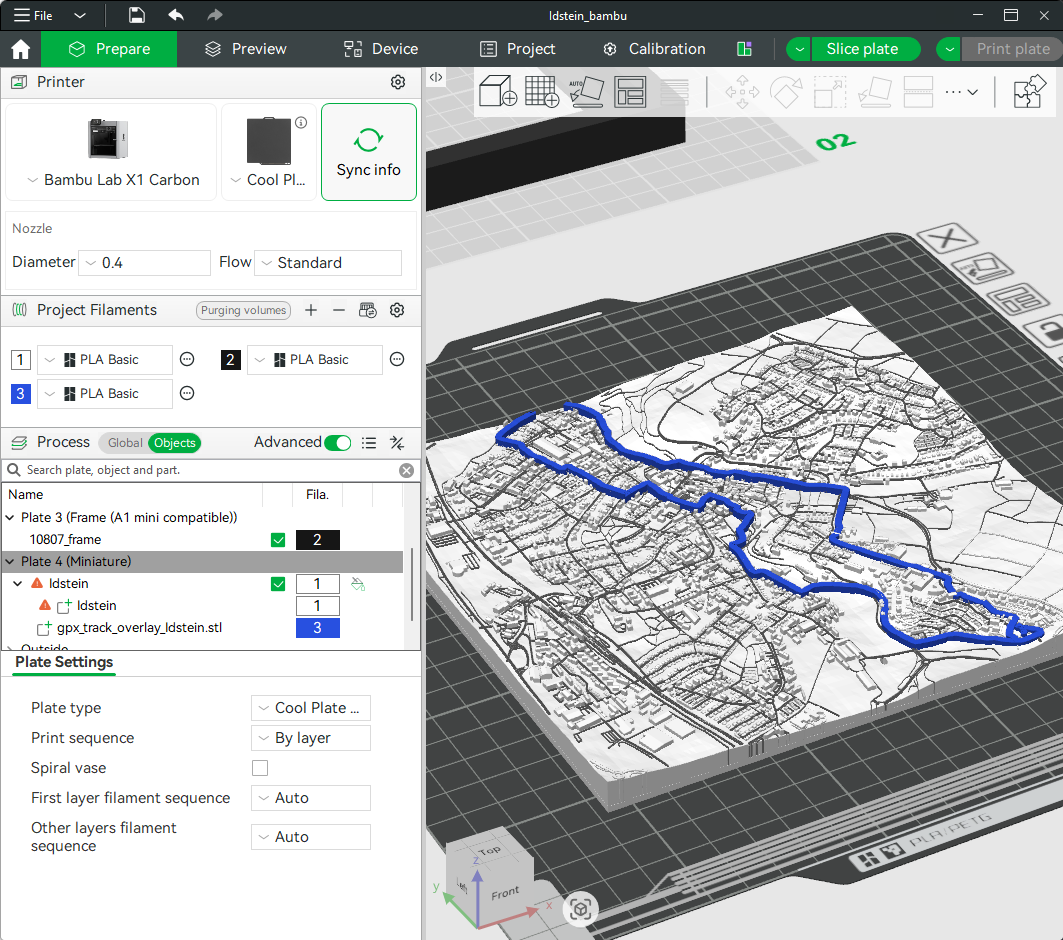
Step 7 Positioned and ready to slice
The track is now correctly positioned and colour-coded over the miniature. The slicer will print the track in the designated filament colour at the correct elevation, creating a vivid highlight of your personal route over the geographic terrain.
Before hitting Slice, read the next two steps to avoid a common artefact issue.
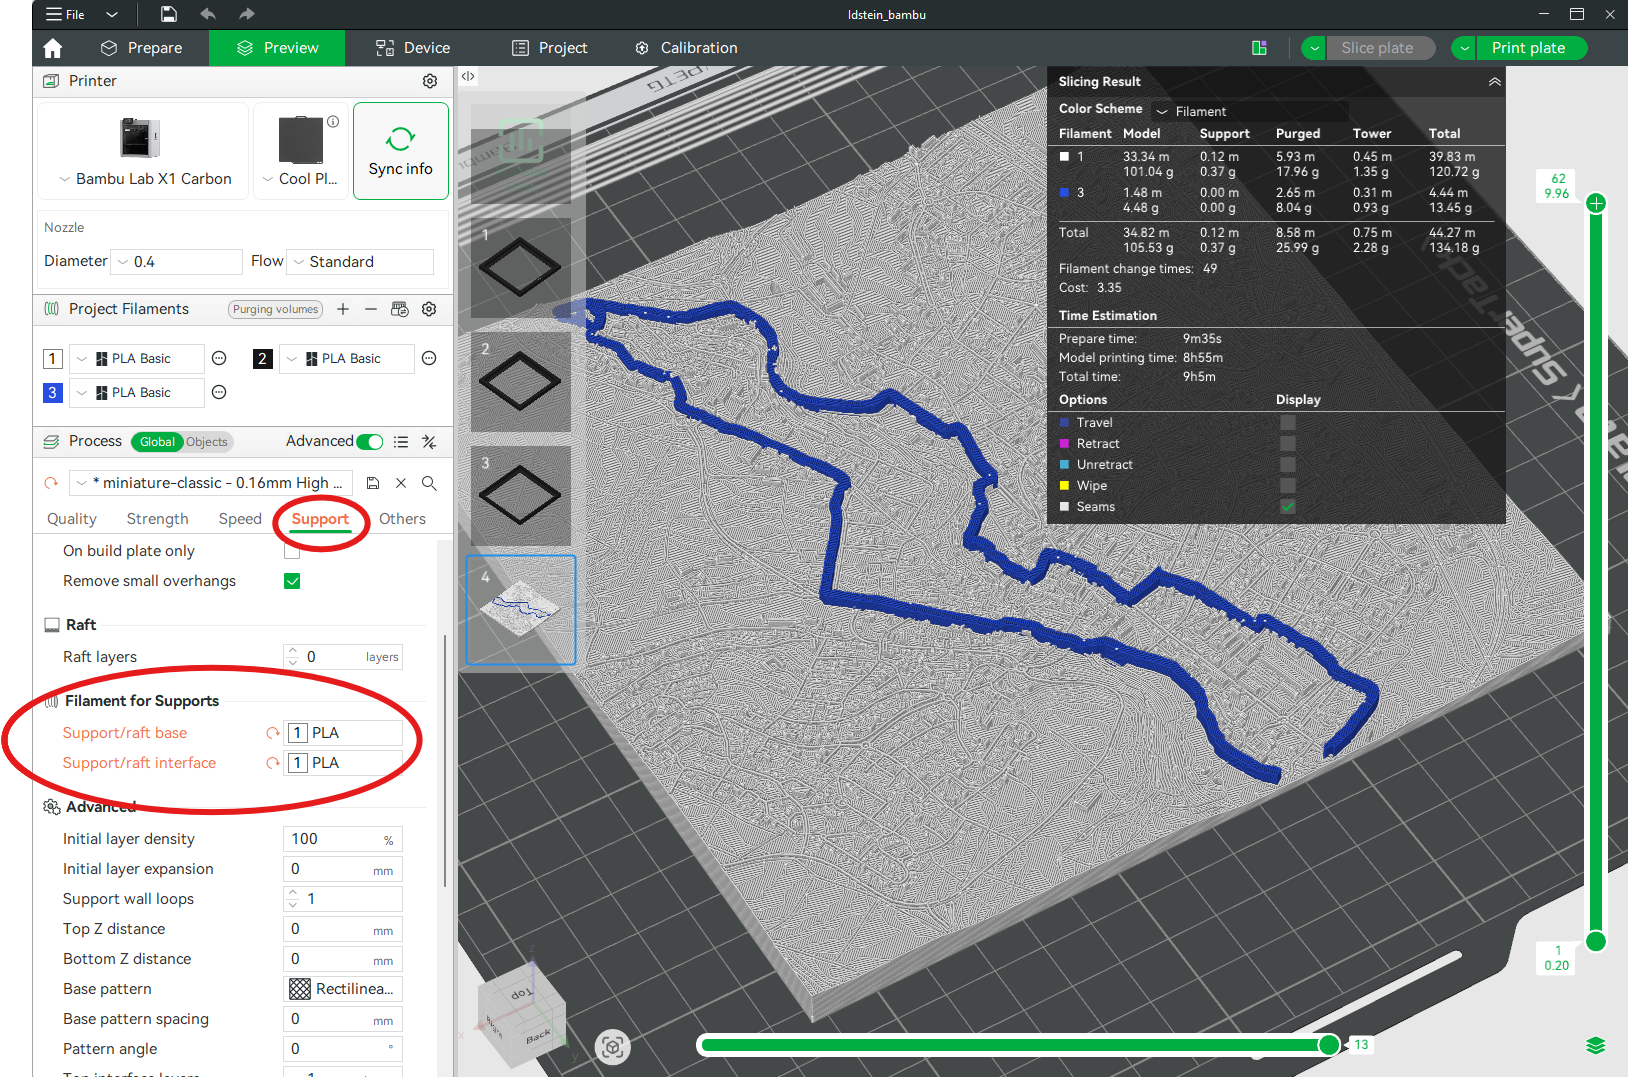
Step 8 Watch out for slicing artefacts
After slicing, switch to the Preview tab and scroll through the lower layers. You may see scattered coloured dots or blobs around the base of the print (indicated by the red circle in the image). These artefacts appear when the slicer accidentally uses the track’s coloured filament for the support structure.
If you see this, do not start printing yet — follow Step 9 to eliminate them.
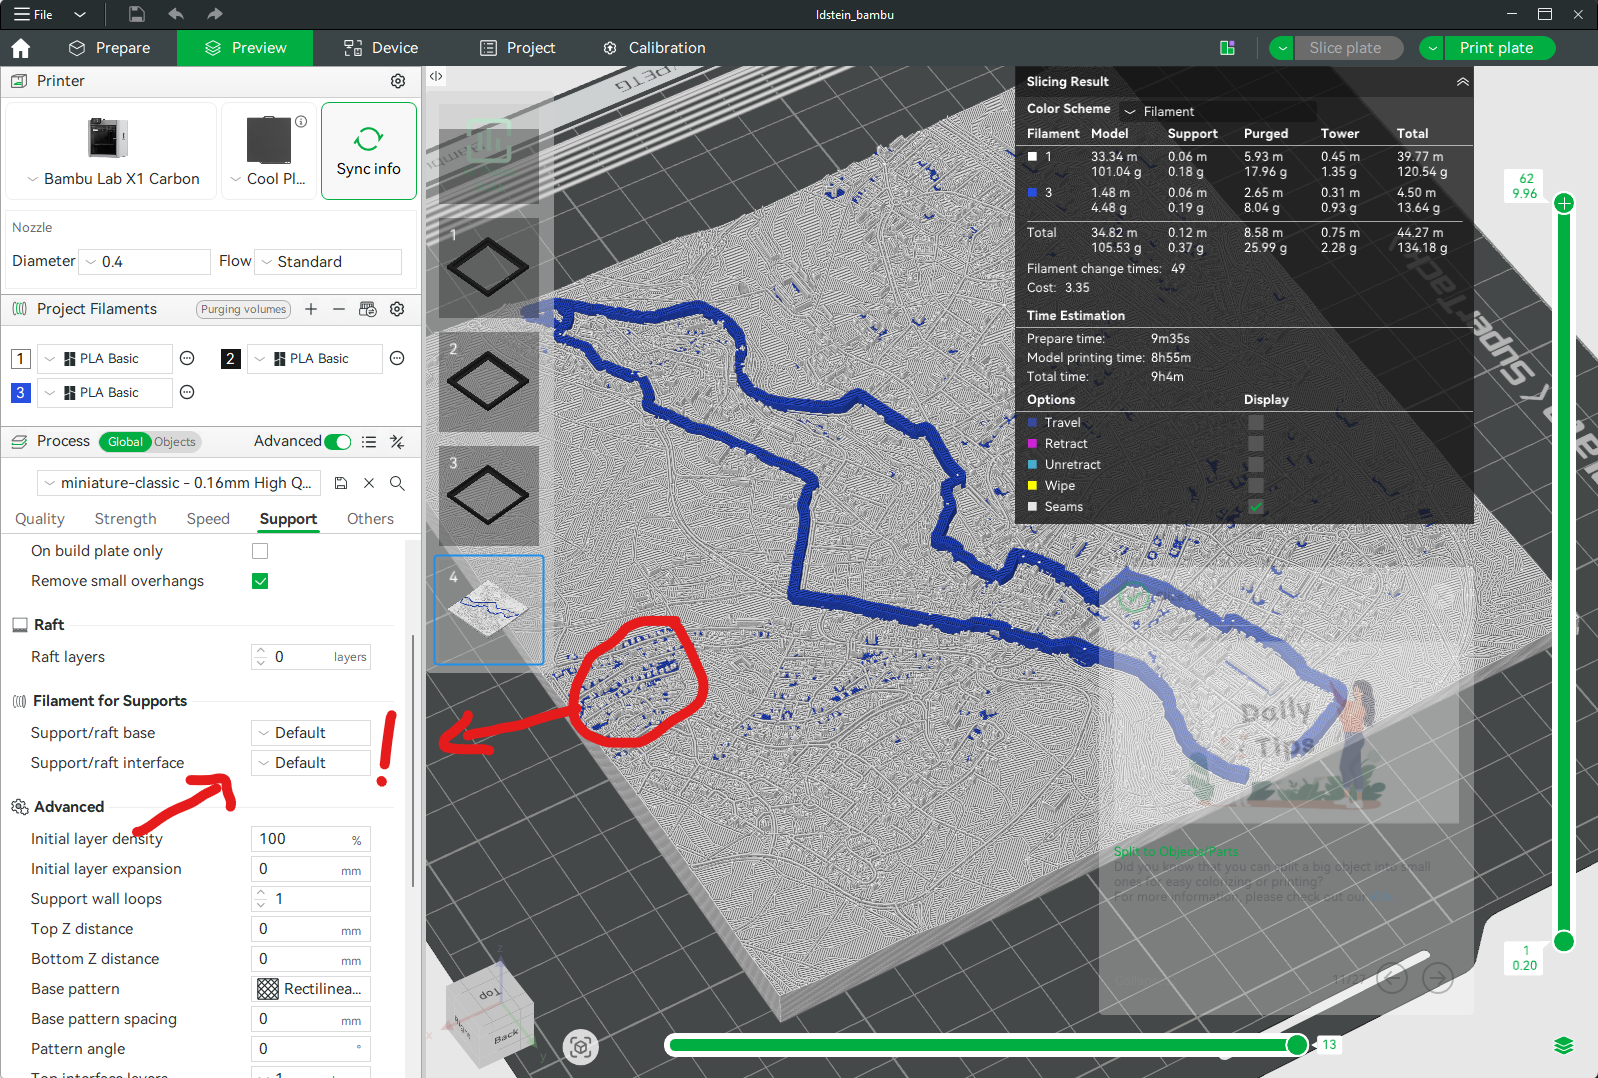
Step 9 Eliminate artefacts with an explicit support filament
Prevent the track colour from bleeding into support structures by assigning your primary filament explicitly for supports:
- In Bambu Studio / Orca Slicer, open the Support settings tab.
- Scroll to Advanced → Filament for Supports.
- Set Support/craft base to your white (or primary) filament explicitly, instead of leaving it as “Default”.
Re-slice and check the preview — the artefacts will be gone. The track colour now appears only on the track geometry itself.